Everyone has seen the Color module in action. Going forward I will say that if your theme is too complex, then this module immediately flies away, because its current functionality is too sparse. Elementary, it is impossible to add an alpha-channel to the color, and this already causes some difficulties (I had to change the layout slightly).
The Color module is standard, you don’t need to download it, just turn it on in the list of modules if it’s off.
Why is it called Color Handling? This module also supports slicing png files, creating gradients on them, as well as the ability to create a preview of what is done, I will just look at the basic work with changing colors.
Preparing
So, from introduction to business. For this guide we will need the Color module (from the kernel) as well as some sort of design theme. I made a very simple theme, you can use it or you can make your own, there is no difference.
Create basic files
- Step 1 – In the theme folder create a folder named “color”. If you use the theme from the guide, then it goes like this: sites/all/themes/color_theme/color.
- Step 2 – create, in the newly created color folder, an empty file named “color.inc”.
- Step 3 – in the same folder (color) add a file called “base.png”. It does not matter what it will be, just a file with that name is mandatory, and necessarily a picture.
- Step 4 – create, all in the same folder, a styles file named “color.css”.
The result should be as follows.

Integrate with the theme.
It’s time to add functionality to the theme. Let’s start by customizing the “color.inc”.
- Step 1 – first add the basic settings of the module. This contains all the variables for colors that you will be able to change. The file starts with <?php, but doesn’t close!
// An array with all the settings.
$info = array();

// Declare all color variables.
// Each variable is a field for choosing a color.
// Have the form: // 'key' => 'label'.
// You can use the t() function.
$info['fields'] = array(
    'bg' => 'Site background',
    'page_bg' => 'Page background',
    'link_color' => 'Link color',
    'menu_bg_color' => 'Background color of menu items',
    'menu_link_color' => 'Menu item link color',
);- Step 2 – we’ll create some base color schemes.
// Declare base color schemes (pre-defined).
$info['schemes'] = array(
//declare a mandatory scheme, which will be used by default, and
// which will be used as the default one // by the Color module.
'default' => array(
//name of the color scheme. Will be displayed in the list of all schemes.
'title' => 'Default color scheme',
// Set colors for each key ($info['fields']).
// I take all the default values from CSS.
// The color must be in HEX format, starting with a grid and be in lower
// case.
'colors' => array(
'bg' => '#f1f1f1',
'page_bg' => '#ffffffff',
'link_color' => '#2158ce',
'menu_bg_color' => '#ecececec',
'menu_link_color' => '#000000',
),
),
//Add another color scheme but with the colors we need.
'example' => array(
'title' => 'Example extra scheme',
// Make it completely white.
'colors' => array(
'bg' => '#ffffffff',
'page_bg' => '#ffffffff',
'link_color' => '#ffffffff',
'menu_bg_color' => '#ffffffff',
'menu_link_color' => '#ffffffff',
),
),
);- Step 3 – connect color.css.
First of all let’s specify that this file will be used by the Color module. To do this, add the following in the same file color.inc:
// The path is relative to the theme's root.
$info['css'] = array('color/color.css');
Next we need to connect color.css to the theme so that it is loaded with the page. To do this, add a line in the color_theme.info file with the style connection.
; Styles
stylesheets[all][] = css/style.css
stylesheets[all][] = color/color.css
It’s important that color.css is plugged in somewhere at the end. Because if we include it before style, nothing will work. Who doesn’t understand what the trick is, google CSS priority.
- Step 4 – we need to add all the elements, classes, identifiers in color.css that will change. The values must be as in “default”. The principle is simple. It takes the first color from the default – it is #f1f1f1, then opens the file color.css, looking for it there and replacing it with what is specified in this field now (the color). I.e. if you have matching colors, but they must be different afterwards, you will have to change the color a bit, for example #f1f1ff2.
/* bg */
body {
background: #f1f1f1f1;
}
/* bg */
body {
background: #f1f1f1f1;
}
/* link_color */
a {
  color: #2158ce;
}

/* page_bg */
#page-wrapper {
    background: #ffffffff;
}

/* menu_bg_color && menu_link_color */
#navigation ul.menu li a {
  background: #ececec;
  color: #000000;
}- Step 5 – add the settings to our theme. The code is added to the theme’s template.php
/**
* Use template_preprocess_html().
*/
function color_theme_process_html(&$variables) {
if (module_exists('color')) {
_color_html_alter($variables);
}
}
/**
 * Use template_process_page().
 */
function color_theme_process_page(&$variables, $hook) {
 if (module_exists('color')) {
 _color_page_alter($variables);
 }
}- Step 6 – To avoid a bunch of errors, we need to specify default values for features that we don’t use. To do this, go back to color.inc and add the following lines:
/**
 * The settings below are empty. The color module needs them even if we don't
 * use them in our theme.
 */

// The path is specified relative to the theme root.
$info['css'] = array('color/color.css');

// Files to copy. (color.css is copied automatically)
$info['copy'] = array();

// files to be used in the preview.
$info['preview_css'] = 'color/preview.css';
$info['preview_js'] = 'color/preview.js';
$info['preview_html'] = 'color/preview.html';

//declaration of gradients.
$info['gradients'] = array();

// Coordinates for filling.
$info['fill'] = array();

// Coordinates for slicing the image.
$info['slices'] = array();

// base picture.
$info['base_image'] = 'color/base.png';
That’s it. Now reset the site cache, and then go into the theme settings. You will see the color settings section.
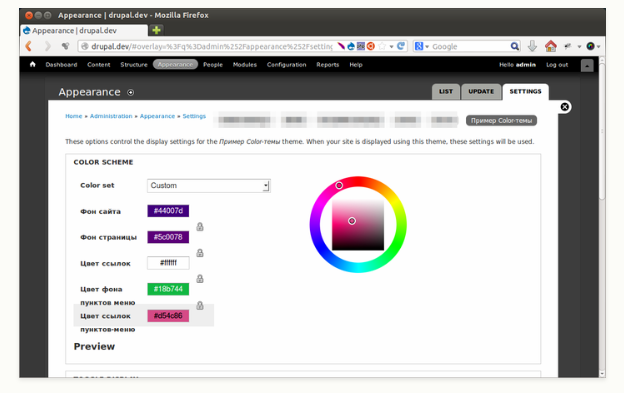
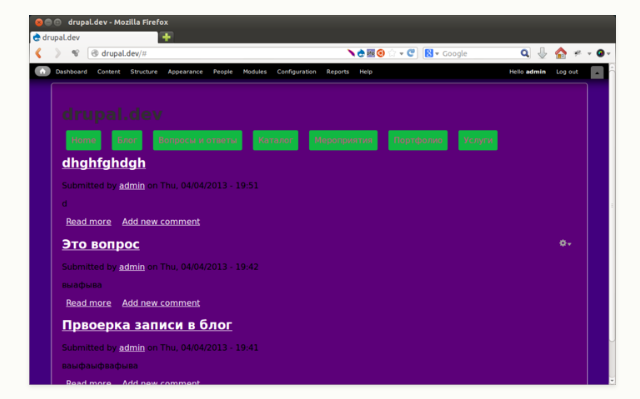
If you want to set the colors yourself, don’t forget to select in Color set: Custom.
Then save the settings and see the result.
P.s. If you get berrores about preview.html or preview.js, just create files with those names in the color folder.

